ICT Fair Value Gaps (FVG): How to Identify, Trade and Map Them Into Your Execution Plan
Learn what ICT Fair Value Gaps are, how to spot bullish and bearish FVGs, which gaps are worth trading, and how to wire them into a repeatable execution plan.
Fair Value Gaps are the engine behind almost every ICT entry model — Silver Bullet, OTE, Power of 3, all of them. Here's how to identify real FVGs, filter out the noise, and wire them into a decision tree you can actually execute from.
What is a Fair Value Gap in ICT trading?
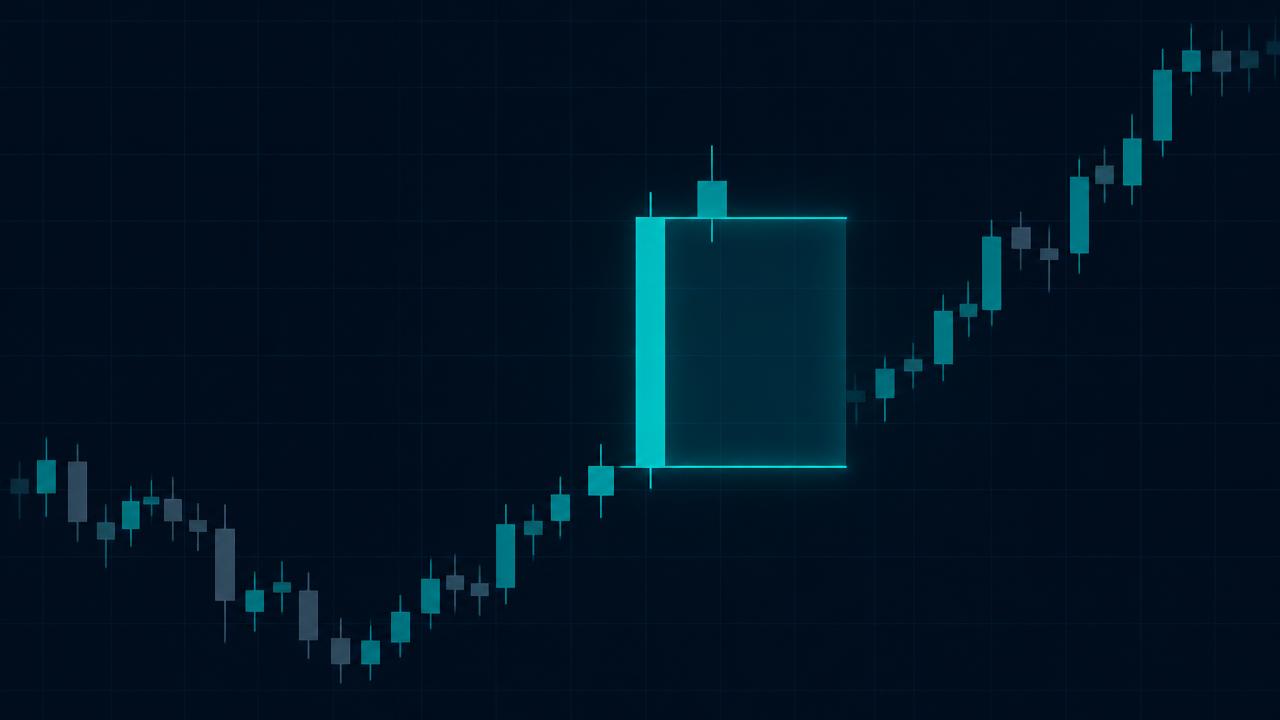
A Fair Value Gap (FVG) is a three-candle price pattern where the middle candle moves so aggressively that the wicks of the first and third candles never overlap. That untouched space between the wicks is the gap — an area where price was delivered so fast that normal two-sided trading simply didn't happen.
In ICT's framework, that gap is an imbalance: buyers or sellers were in complete control for a moment and the auction skipped past a range of prices. Institutional theory holds that price tends to return to those zones to rebalance before continuing. If you want the textbook framing of raw price action behind that idea, Investopedia's primer is a clean starting point.
Be precise about what an FVG is not. It is not a traditional chart gap between session closes and opens. FVGs form intracandle, on any timeframe, in any market — forex, indices, crypto, futures. Michael Huddleston treats FVGs as one of the most important concepts in the entire methodology, and once you look closely you'll find them inside virtually every ICT entry model he teaches.
How a Fair Value Gap forms — the three-candle rule
The mechanics never change. Three candles, one aggressive middle candle, one untouched band of price.
- Candle 1 prints and establishes the reference high (for a bullish gap) or low (for a bearish gap).
- Candle 2 — the displacement candle — drives hard in one direction. This is the candle that creates the imbalance: a large body, usually with minimal wick on the displacement side.
- Candle 3 opens and trades, but its wick does not reach back far enough to overlap Candle 1's wick. The space between Candle 1's high and Candle 3's low (bullish), or Candle 1's low and Candle 3's high (bearish), is the Fair Value Gap.
Picture three people standing in a line. If the middle person is so tall that you can draw a horizontal band above the shoulders of both shorter people without touching either of them, that empty band is the gap.
A bullish FVG forms during upward displacement and sits below current price — Candle 1 high to Candle 3 low. You're looking for price to retrace down into it for a long. A bearish FVG forms during downward displacement and sits above price — Candle 1 low to Candle 3 high — and you're looking for a retrace up into it for a short. Same rule, mirrored.
Mark them on whatever charting platform you already use; TradingView makes it trivial to drop a zone from Candle 1's wick to Candle 3's wick and drag it forward in time.
Not every FVG is tradeable — here's how to filter
This is where most traders lose money. The pattern is easy; the filtering is the skill.
Displacement quality matters. A "gap" formed by three tiny-bodied candles drifting sideways is not the same animal as one left by an aggressive candle that ripped through a swing point. The displacement candle should have a notably large body relative to its neighbours, and ideally break a recent swing high or low as it goes.
Context beats pattern. An FVG that forms inside a consolidation range with no directional bias is low probability. An FVG that forms after a liquidity sweep, inside a killzone, and in line with your daily bias from market structure is a different trade entirely. The gap is only the entry zone — the context is what makes it worth taking.
Consequent encroachment (CE). ICT's term for the 50% midpoint of the gap. Many traders use the CE as their precision entry instead of the full zone, because it gives a tighter stop and better risk-reward. The trade-off is real: price doesn't always trade that deep before reversing, so CE entries miss more often.
Timeframe hierarchy. A 4H or Daily FVG carries far more weight than a 1m or 5m one. A 5-minute gap that sits inside a 4-hour gap is high-confluence. A 1-minute gap with no higher-timeframe reference is noise you'll pay tuition for.
Filled vs unfilled. Once price trades and closes through the entire zone, the gap is mitigated. It has done its job and is no longer a valid entry reference. Delete it from the chart.
How Fair Value Gaps power the major ICT setups
Once you see FVGs clearly, the ICT models stop looking like separate strategies and start looking like variations on one idea.
- Silver Bullet — the Silver Bullet entry is an FVG entry. Sweep inside the window, displacement leaves a gap, you enter on the retrace. The FVG is the trigger.
- Optimal Trade Entry — the 0.618–0.79 OTE zone frequently overlaps the FVG left by the displacement leg. Two independent institutional references at the same price is exactly the confluence you want.
- Power of 3 — in the manipulation phase price sweeps liquidity and displaces, and that displacement leaves the gap you use to join the distribution leg.
- Break of Structure / Change of Character — a valid FVG entry needs a preceding BOS for continuation or CHoCH for reversal. Without structural confirmation, an FVG is just a rectangle on a chart.
- Liquidity sweeps — the canonical sequence is sweep → displacement → FVG → entry. The sweep is the why, the displacement is the what, the gap is the where.
- Kill zones — the cleanest gaps form during London open, New York AM and New York PM. Gaps printed outside those windows are statistically weaker.
How to trade a Fair Value Gap — step by step
- Establish your daily bias. Daily and 4H first. Decide whether you're hunting longs or shorts today, and don't take counter-trend gaps without a higher-timeframe reason.
- Identify the liquidity target. Mark buy-side and sell-side liquidity — previous highs and lows, equal highs and equal lows. These are what price is being drawn toward.
- Wait for the sweep. Price takes the level, wicking through or trading through and rejecting. This is your catalyst, not your entry.
- Watch for displacement. After the sweep, price should move away hard with a strong-bodied candle. No displacement, no valid gap.
- Mark the FVG. Candle 1 wick to Candle 3 wick. Mark the full zone and note the 50% CE level inside it.
- Enter on the retrace. When price returns into the zone — or specifically to the CE — take the position. Stops sit beyond the gap: below the zone low for longs, above the zone high for shorts.
- Target the opposing liquidity. Take profit at the pool on the other side of the range, the level price is actually being delivered toward.
Five mistakes that kill FVG trades
- Trading every gap on the chart. Not all gaps fill, and not every fill produces a move. Filter by context, timeframe and displacement quality.
- Ignoring the higher timeframe. A 1-minute gap means nothing when the 15-minute and 1-hour structure is running the other way.
- Entering before the retrace. Chasing the displacement candle instead of waiting for the return into the zone is the most common beginner error.
- No invalidation level. If price closes beyond the far side of the gap, the setup is dead. Take the miss and move on.
- Trading gaps in consolidation. FVGs are displacement artifacts. In a range with no bias, they lose their edge completely.
Stop drawing rectangles — start architecting your FVG logic
Most traders mark FVGs by dragging a rectangle onto a chart. That rectangle captures the price zone and nothing else — not which killzone produced it, not what liquidity was swept beforehand, not which structural shift confirmed direction, not the risk parameters you agreed to before the session.
AlphaFlow lets you drop FVG nodes onto a visual canvas alongside kill zones, liquidity sweeps, order blocks and risk zones, then wire them into a decision tree that represents your full execution logic. Every version is saved, exportable and shareable, so your rules stop drifting between sessions.
Build your first FVG blueprint — free, no card required.
The gap is the entry. The context is the edge.
The Fair Value Gap is the most important entry mechanism in ICT, but it is only an entry mechanism. Bias, structure, liquidity and timing are what turn a gap into a trade worth risking capital on. Get the context right and the gap becomes obvious — explore the other concepts and the whole model starts to lock together.
Build the blueprint, not just the idea
AlphaFlow turns concepts like the ones in this article into versioned, testable execution blueprints — so every entry has a logged reason.
Launch the terminal